Google Plus API Tutorial
Introduction
Google Plus API for developers allows you to fetch public data from Google+. In this tutorial w3resource discusses an overview of Google Plus API, followed by detail tutorial of all the necessary steps one need to perform to successfully fetch public data from Google+.
Overview of Google+ API
The Purpose of Google+ API is to provide a programming interface so that you can integrate application or website with Google+.
Google implies a limit to the usage of Google+ API - Each developer has a quota. We will see about that when we will discuss Google API console.
Google uses OAuth2.0 protocol to authorize your application when it tries to access user data.
It mostly uses standard HTTP method by means of RESTful API design to fetch and manipulate user data.
So, to get the profile information of a user, syntax of the command which has to be used is following:
GET https://www.googleapis.com/plus/v1/people/userId
Where userId is the userid of the user whose profile information you want to fetch.
Google uses JSON Data Format to represent the resources in the API.
You may pass several parameters while fetching data using Google+ API. Following table shows the common parameters used :
| Parameter | Value | Description |
|---|---|---|
| callback | string | If you want to use JSONP with the API, this specifies the JavaScript function to which the response data will be passed. |
| fields | string | For better performance, if you want to include only certain fields, referred as Partial Response, this specifies the list of fields. |
| key | string | API key provided to a registered developer. Used to authorize the corresponding application when it tries to access the user data. |
| access_token | string | OAuth 2.0 token for the current user. |
| prettyPrint | boolean | You can set it to 'true' to make the code more readable by adding indentation and line breaks. |
| userIp | boolean | This is to identify the IP address of the user, whose data is sought by making an API call. If a server-side application makes an API call, this keeps the restriction implied by user-quota enforced. |
Though each API resource (like people, activities) has some unique properties, there are properties which are common to all resources. The following table shows the properties common to all resources:
| Property | Value | Description |
|---|---|---|
| displayName | string | Name of the resource. May be used for displaying data to user. |
| id | string | For better performance, if you want to include only certain fields, referred as Partial Response, this specifies the list of fields. |
| kind | string | Identifies what kind of resource a JSON object represents. While parsing, a user data(in JSON format), if an unknown object is found, this may help to decide how to parse that programmatically. |
| url | string | Primary url or permalink for the associated resource. |
If the API returns a large number of collection, then each response comprises of a limited number of items, which may be obtained by 'maxResults'. By passing the value of 'nextPageToken' property of each response to 'pageToken' property, next request can be obtained. Repeating this process, you may obtain the full response.
After you finish the above write up, it's time to get your hands dirty but trying a simple application.
Step 1: Generate an API key through Google API Console
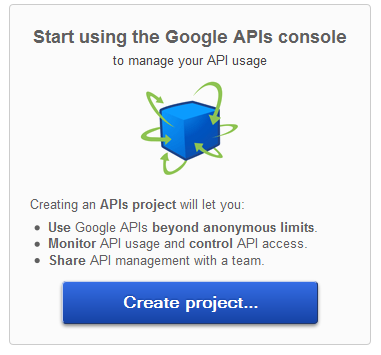
Point your browser to code.google.com/apis/console/ and it will take you to the login page of the API Console.
Point your browser to code.google.com/apis/console/ and it will take you to the login page of the API Console. Once you logged in with your email and password, the following will appear. Click on the 'Create Project'.
In the list of services find the Google+ API and Click on 'off' to turn it on.
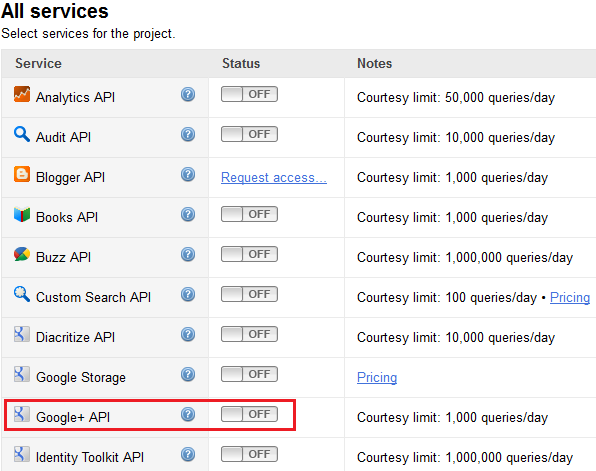
In the next screen check 'I Agree..' and click on 'Accept'. You will see that the button next to Google+ API has changed to following:

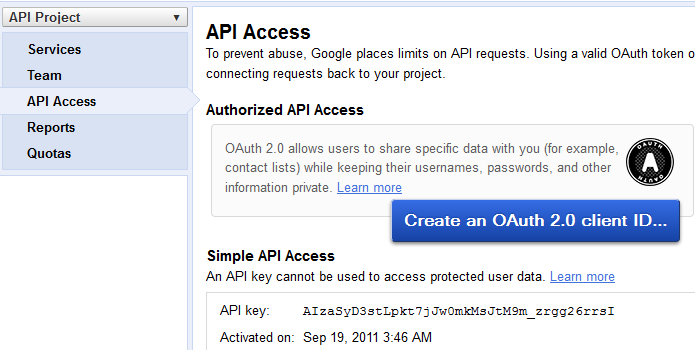
Now click on the 'API Access' and it will ask you to 'Create an OAuth 2.0 client id..'.
In the next screen, provide a product name, upload an image as logo of your project, and click 'Next'.
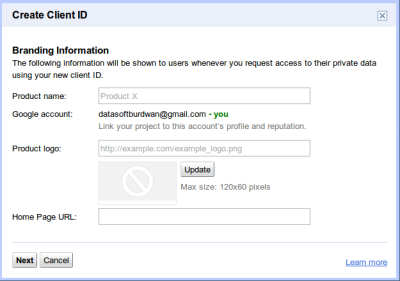
In the next screen, you will get information as following -
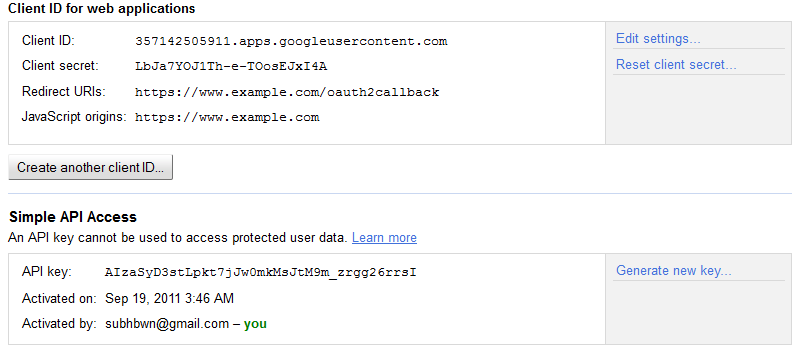
This information will be required to make an API call.
Step 2: Create a simple application to fetch user profile information using Google+ API
We will create a simple form. In that form, if an userid is supplied, it will return certain information regarding that user.
Following is the code of a simple HTML page containing a form :
<!doctype html>
<html>
<head>
<title>Google + API example</title>
</head>
<body>
<p>Insert an ID : </p>
<form method="POST" action="example.php">
<input type="text" name="id" /><br />
<input type="Submit" name="submit" value="Submit" />
</form>
</body>
</html>
We will use Google API PHP Client to accomplish the task. So, you need to download that. Point your browser to code.google.com/p/google-api-php-client/ and obtain the Google API PHP Client. Unzip it and save it to the folder where your application's html and php file will reside.
Following is the PHP code of our application.
<?php
    /* * Copyright 2011 Google Inc.
    *
    * Licensed under the Apache License, Version 2.0 (the "License");
    * you may not use this file except in compliance with the License.
    * You may obtain a copy of the License at
    *
    * http://www.apache.org/licenses/LICENSE-2.0
    *
    * Unless required by applicable law or agreed to in writing, software
    * distributed under the License is distributed on an "AS IS" BASIS,
    * WITHOUT WARRANTIES OR CONDITIONS OF ANY KIND, either express or implied.
    * See the License for the specific language governing permissions and
    * limitations under the License.
    */
    require_once 'google-api-php-client/src/apiClient.php';
    require_once 'google-api-php-client/src/contrib/apiPlusService.php';
  session_start();
  $id = $_POST['id'];
  $client = new apiClient();
    $client->setApplicationName("Google+ PHP Starter Application");
    // oauth2_client_id, oauth2_client_secret, and to register your oauth2_redirect_uri.
    $client->setClientId('357142505911.apps.googleusercontent.com');
    $client->setClientSecret('LbJa7YOJ1Th-e-TOosEJxI4A');
    $client->setRedirectUri('https://www.w3resource.com/API/google-plus/example.php');
    $client->setDeveloperKey('AIzaSyD3stLpkt7jJw0mkMsJtM9m_zrgg26rrsI');
    $plus = new apiPlusService($client);
  if (isset($_REQUEST['logout'])) {
    unset($_SESSION['access_token']);
    }
  if (isset($_GET['code'])) {
    $client->authenticate();
    $_SESSION['access_token'] = $client->getAccessToken();
    header('Location: http://' . $_SERVER['HTTP_HOST'] . $_SERVER['PHP_SELF']);
    }
  if (isset($_SESSION['access_token'])) {
    $client->setAccessToken($_SESSION['access_token']);
    }
  if ($client->getAccessToken()) {
    $me = $plus->people->get($id);
  $optParams = array('maxResults' => 100);
    $activities = $plus->activities->listActivities($id, 'public', $optParams);
  // The access token may have been updated lazily.
    $_SESSION['access_token'] = $client->getAccessToken();
    } else {
    $authUrl = $client->createAuthUrl();
    }
    ?>
  <!doctype html>
    <html>
    <head><link rel='stylesheet' href='style.css' /></head>
    <body>
    <header><h1>Google+ Sample App</h1></header>
    <div class="box">
  <?php if(isset($me) && isset($activities)): ?>
    <div class="me">
    <p><a rel="me" href="<?php echo $me['url'] ?>"><?php print $me['displayName'] ?></a></p>
    <p><?php print $me['tagline'] ?></p>
    <p><?php print $me['aboutMe'] ?></p>
    <div><img src="<?php echo $me['image']['url']; ?>?sz=82" /></div>
    </div>
    <div class="activities">Your Activities:
    <?php foreach($activities['items'] as $activity): ?>
    <div class="activity">
    <p><a href="<?php print $activity['url'] ?>"><?php print $activity['title'] ?></a></p>
    </div>
    <?php endforeach ?>
    </div>
    <?php endif ?>
    <?php
    if(isset($authUrl)) {
    print "<a class='login' href='$authUrl'>Connect Me!</a>";
    } else {
    //print "<a class='logout' href='?logout'>Logout</a>";
    }
    ?>
    </div>
    </body>
    </html>
There is a style sheet attached to the HTML code. Here it is
/*
 * Copyright 2011 Google Inc.
 * Licensed under the Apache License, Version 2.0 (the "License");
 * you may not use this file except in compliance with the License.
 * You may obtain a copy of the License at
 *
 *     http://www.apache.org/licenses/LICENSE-2.0
 *
 * Unless required by applicable law or agreed to in writing, software
 * distributed under the License is distributed on an "AS IS" BASIS,
 * WITHOUT WARRANTIES OR CONDITIONS OF ANY KIND, either express or implied.
 * See the License for the specific language governing permissions and
 * limitations under the License.
 */
body {
  font-family: Arial,sans-serif;
  margin: auto;
}

.box {
  border: .5em solid #E3E9FF;
  -webkit-box-orient: vertical;
  -webkit-box-align: center;
  -moz-box-orient: vertical;
  -moz-box-align: center;
  display: block;
  box-orient: vertical;
  box-align: center;
  width: 750px;
  height: auto;
  margin: auto;
  padding: 10px;
  word-wrap: break-word;
  text-overflow: ellipsis;
}

.me {
  -webkit-box-flex: 1;
  -moz-box-flex: 1;
  box-flex: 1;
  width: 700px;
}

.activities {
  -webkit-box-flex: 2;
  -moz-box-flex: 2;
  box-flex: 2;
  width:100%;
}

.activity {
  margin: 10px;
}

header {
  color:#000;
  padding:2px 5px;
  font-size:100%;
  width: 400px;
  margin: auto;
  text-align: center
}

header h1.logo {
  margin:6px 0;
  padding:0;
  cursor:pointer;
  font-size:24px;
  line-height:20px;
}

.login {
  font-size: 200%;
  display: block;
  margin: auto;
  cursor: pointer;
  text-align: center;
  font-weight: bold;
  color: #2779AA;
  line-height: normal;
}

.logout {
  font-weight: normal;
  padding-top: -5px;
  margin-top: 0px;
}
In the PHP code above, change clientId at line number 28, change ClientSecret at line number 29, change RedirectUri at line number 30, change DeveloperKey at line number 31, with your own. Also remember that in Google API Console, change the RedirectUri as you have given in you app's php code.
Now point your browser to the url of your application and supply an userid. You can obtain a userid by googling 'google profile username' where username is an existing username. You will get an url like 'https://plus.google.com/XXXXXXXXXXXXXXX'. 'xx..' is a number and this is the userid of that user. The application will return you the name, tagline, aboutme information regarding the user whose id you have supplied.
In the next part of the tutorial, we will tweak this application to a better one and also we will see to fetch some other resources from the API.
Go to:
NEXT : YouTube API Tutorial