Python chat application with PyQt - Messaging interface
Write a Python program to build a chat application that displays messages after typing a new message. Use the PyQt module.
From doc.qt.io:
QApplication Class: The QApplication class manages the GUI application's control flow and main settings.
QMainWindow Class: The QMainWindow class provides a main application window.
QWidget Class: The QWidget class is the base class of all user interface objects.
QVBoxLayout Class: The QVBoxLayout class lines up widgets vertically.
QLabel Class: The QLabel widget provides a text or image display.
QLineEdit Class: The QLineEdit widget is a one-line text editor.
Sample Solution:
Python Code:
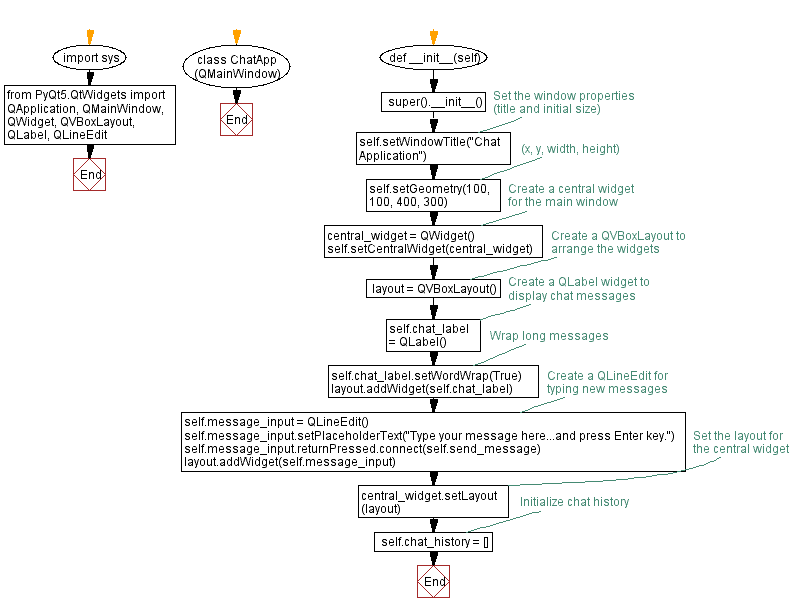
import sys
from PyQt5.QtWidgets import QApplication, QMainWindow, QWidget, QVBoxLayout, QLabel, QLineEdit
class ChatApp(QMainWindow):
def __init__(self):
super().__init__()
# Set the window properties (title and initial size)
self.setWindowTitle("Chat Application")
self.setGeometry(100, 100, 400, 300) # (x, y, width, height)
# Create a central widget for the main window
central_widget = QWidget()
self.setCentralWidget(central_widget)
# Create a QVBoxLayout to arrange the widgets
layout = QVBoxLayout()
# Create a QLabel widget to display chat messages
self.chat_label = QLabel()
self.chat_label.setWordWrap(True) # Wrap long messages
layout.addWidget(self.chat_label)
# Create a QLineEdit for typing new messages
self.message_input = QLineEdit()
self.message_input.setPlaceholderText("Type your message here...and press Enter key.")
self.message_input.returnPressed.connect(self.send_message)
layout.addWidget(self.message_input)
# Set the layout for the central widget
central_widget.setLayout(layout)
# Initialize chat history
self.chat_history = []
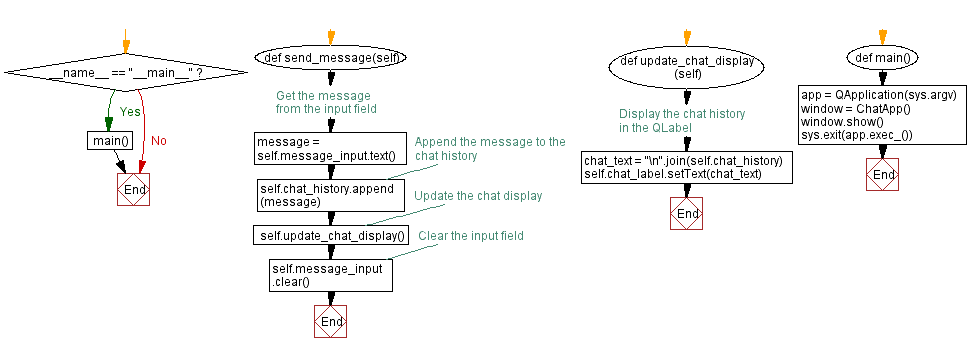
def send_message(self):
# Get the message from the input field
message = self.message_input.text()
# Append the message to the chat history
self.chat_history.append(message)
# Update the chat display
self.update_chat_display()
# Clear the input field
self.message_input.clear()
def update_chat_display(self):
# Display the chat history in the QLabel
chat_text = "\n".join(self.chat_history)
self.chat_label.setText(chat_text)
def main():
app = QApplication(sys.argv)
window = ChatApp()
window.show()
sys.exit(app.exec_())
if __name__ == "__main__":
main()
Explanation:
In the exercise above -
- Import the necessary modules.
- Create a "QMainWindow" named ChatApp with a central widget.
- Set the window's title and initial size.
- Create a QVBoxLayout named layout to arrange the QLabel for displaying chat messages and the QLineEdit for typing new messages.
- Create a QLabel widget (chat_label) to display chat messages and set setWordWrap(True) to wrap long messages.
- Create a QLineEdit widget (message_input) for typing new messages and connect its returnPressed signal to the send_message method.
- The "send_message()" method retrieves the message from the input field, appends it to the chat history list, updates the chat display, and clears the input field.
- The "update_chat_display()" method updates the QLabel with the chat history.
- In the main function, we create the PyQt application, create an instance of the ChatApp class, show the window, and run the application's event loop.
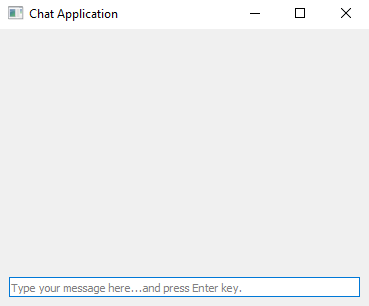
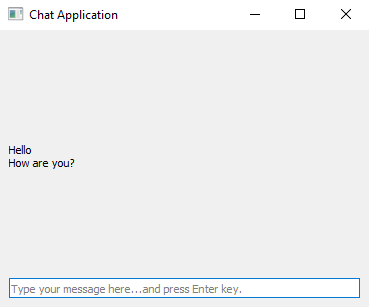
Output:
Flowchart:
Go to:
Previous: Button grid.
Next: Python custom progress bar widget with PyQt.
Python Code Editor:
What is the difficulty level of this exercise?
Test your Programming skills with w3resource's quiz.