Yarn cli commands
CLI introduction
Like any other package manager, you can access the features of yarn from the terminal.
There are numerous command-line commands provided by yarn to help you access various aspects of the yarn package. These includes but not limited to installation, administration, publishing etc.
As part of this series, we will be going over all the commands available to you in alphabetical order. However, some commands are more popular than others. They include:
- yarn add
- yarn init
- yarn install
- yarn publish
- yarn remove
At first glance, you can immediately see why these are very important: their importance is anchored on the fact that to develop a package and publish it. You must have used these command at least once during the development. Let us go over a short description of what they are for in alphabetical order:
- yarn add: the yarn add command is a command you run in your terminal when you want to add a package to your current package (project)
- yarn init: we used this command in our tutorial on getting started, this command is to be run in your terminal. It will initialize the development of a package.
- yarn install: this command will install all the dependencies that is defined in a package.json file. once you have the package.json file for a project, all you need to do, is to go to your terminal and run npm install. And all the dependencies for that project will be installed.
- yarn publish: This command like the others is run from the command line, it enables you to publish your package to a package manager.
- yarn remove: The yarn remove helps you to remove an unused package from your current package, via the command line.
Default command
When you run yarn from the terminal with no command, it runs yarn install.
User-defined scripts
If you run yarn <script>[<args>] in your terminal, yarn will run a user-defined script. More on that in our tutorial on yarn run.
Locally installed CLIs
When you run yarn <command> [<arg>] on the command line, it will run the command if it matches a locally installed CLI. So you don't have to setup user-defined scripts for simple use cases.
Concurrency and - - mutex
Whenever you are running multiple instances of yarn as the same user on the same server, you can ensure only one instance will run at any given time (and avoid conflicts) by passing the global flag -mutex, then followed by file or network.
When you are using file, Yarn will write/read a mutex file .yarn-single-instance in the current working directory by default. You can equally specify an alternate or global filename by running either of these commands in your terminal.
--mutex file```
```--mutex file:/tmp/.yarn-mutex
However, when you are using network, yarn creates a server at port 31997 by default. It is also possible to specify an alternate port by running:
--mutex network``` or
```--mutex network:30330
in your terminal.
Verbose output with --verbose
Running yarn <command> --verbose on the command line, will print verbose info for the execution (creating directories, copying files, HTTP requests, etc.).
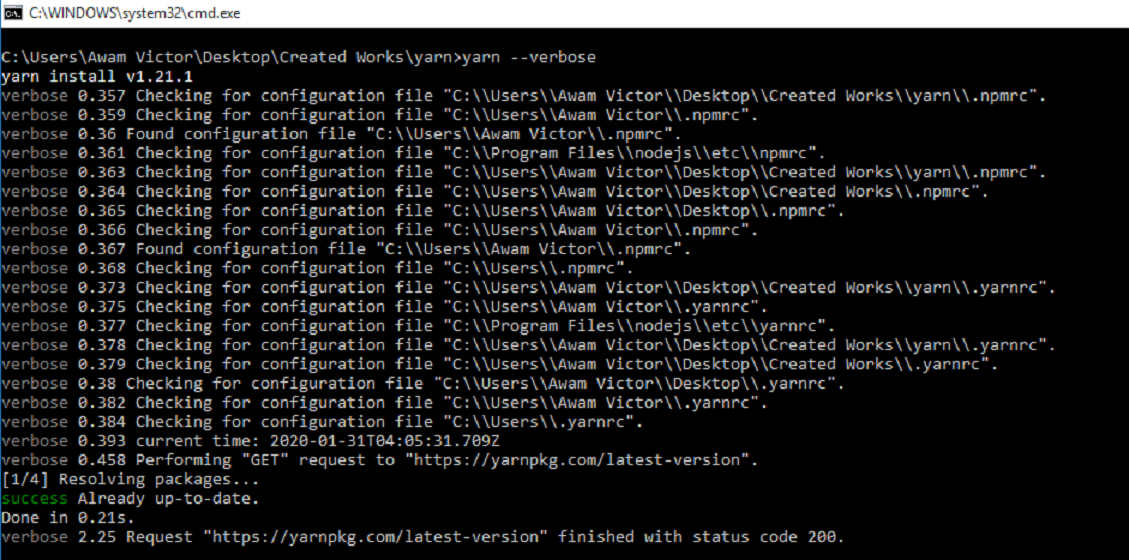
Result of running yarn --verbose
Previous:
Yarn usage: Commands and use Cases.
Next:
How to use the Yarn add command for managing dependencies.