Execute your first query
The most common GraphQL operation is the query, which requests data from your graph in a structure that conforms to your server's schema.
The Apollo iOS SDK requires every query to have a name (even though this isn't required by the GraphQL spec). For example, in the query below, it has the name LaunchList.
query LaunchList {
}
To better understand how query works, open the GraphiQL query explorer here, you can see available queries in the Schema tab as shown in the screenshot below.Click on the launches query at the top for details about it:
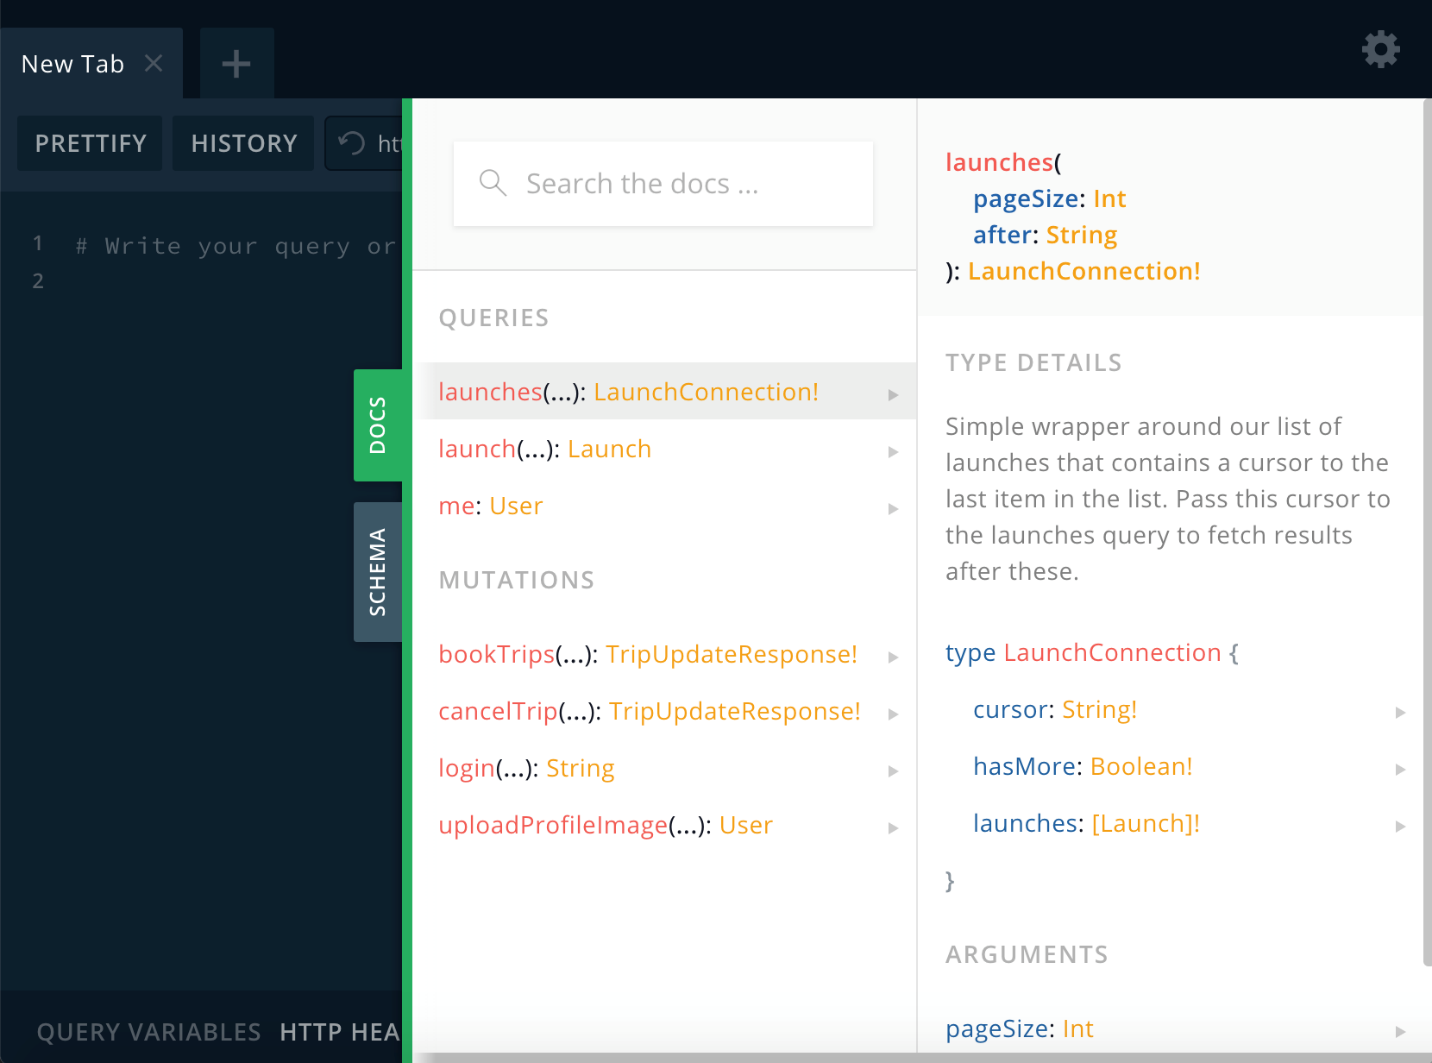
In the right panel, you see both the query itself and information about what the query returns. You can use this information to write a query you'll eventually add to your app.
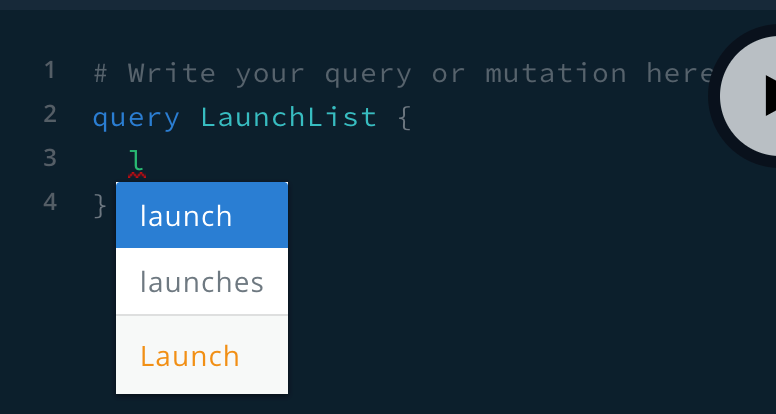
Next, between the query's curly braces, start typing la. An autocomplete box pops up and shows you options based on what's in the schema:
GraphiQL is a great tool for building and verifying queries so you don't have to repeatedly rebuild your project in Xcode to try out changes.
As the schema indicates, the launches query returns a LaunchConnection object. This object includes a list of launches, along with fields related to pagination (cursor and hasMore). The query you write indicates exactly which fields of this LaunchConnection object you want to be returned, like so:
query LaunchList {
  launches {
    cursor
    hasMore
  }
}
If you run this query by pressing the play button in GraphiQL, the query returns results as a JSON object on the right-hand side of the page:
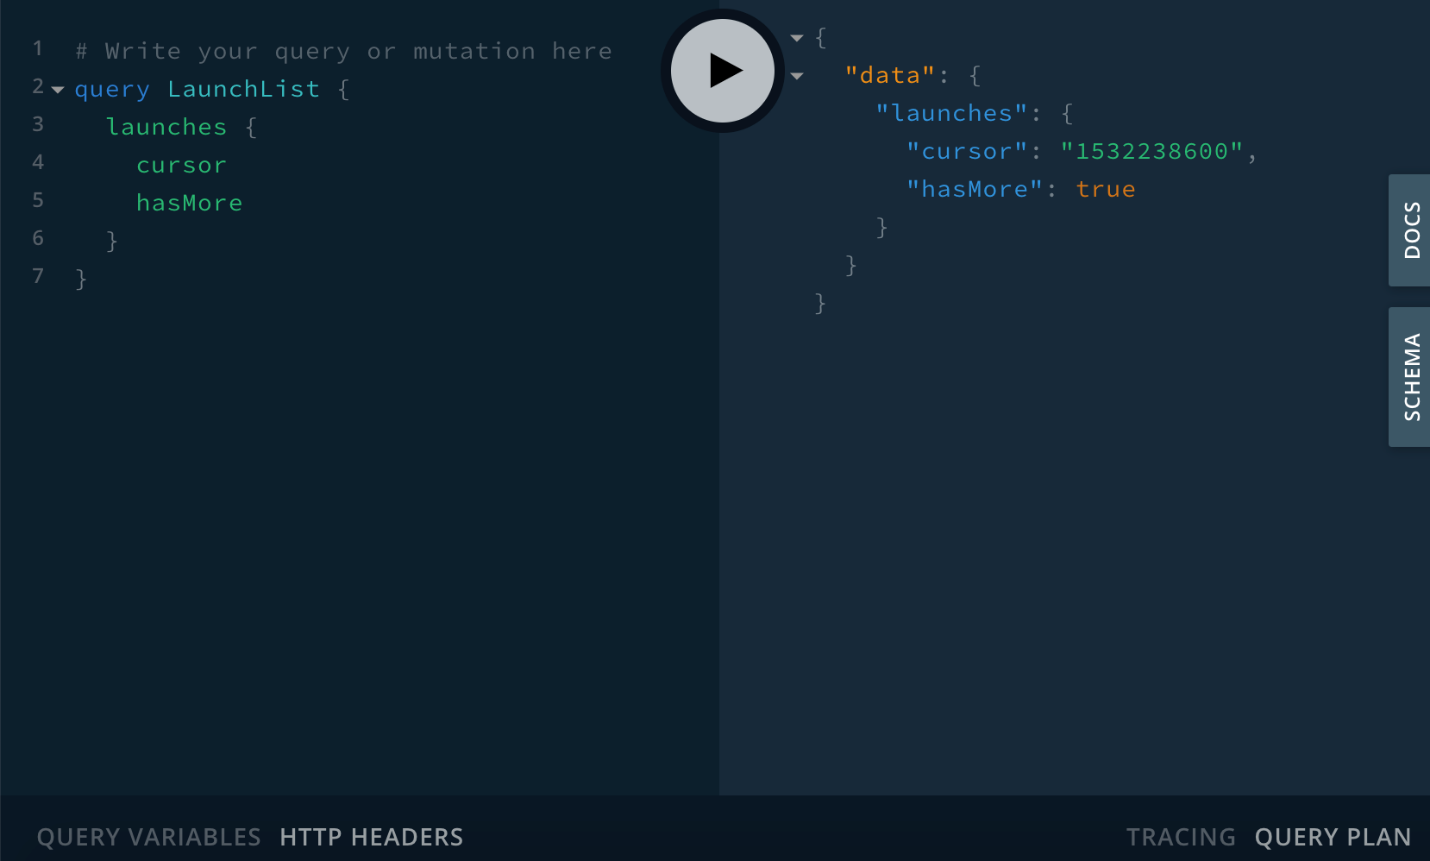
This query executes successfully, but it doesn't include any information about the launches! That's because we didn't include the necessary field in our query.
Update your query to fetch the id and site properties for each launch, like so:
query LaunchList {
  launches {
    cursor
    hasMore
    launches {
      id
      site
}
}
}
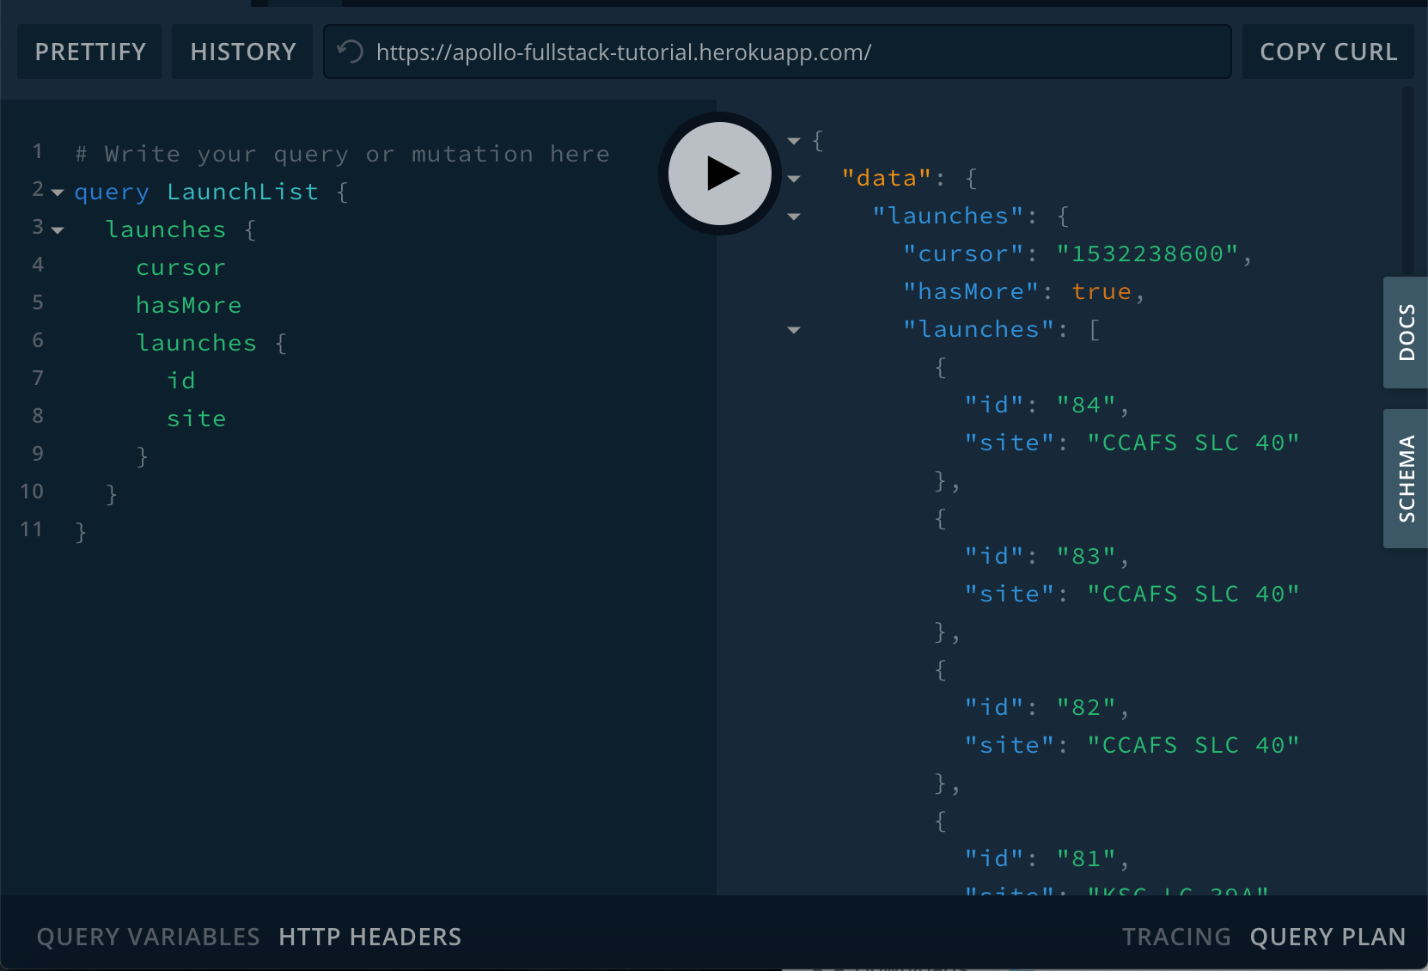
Run the query again, and you'll now see that in addition to the information you got back before, you're also getting a list of launches with their ID and site information:
Adding your query to Xcode
Now that your query is fetching the right data, head back to Xcode.
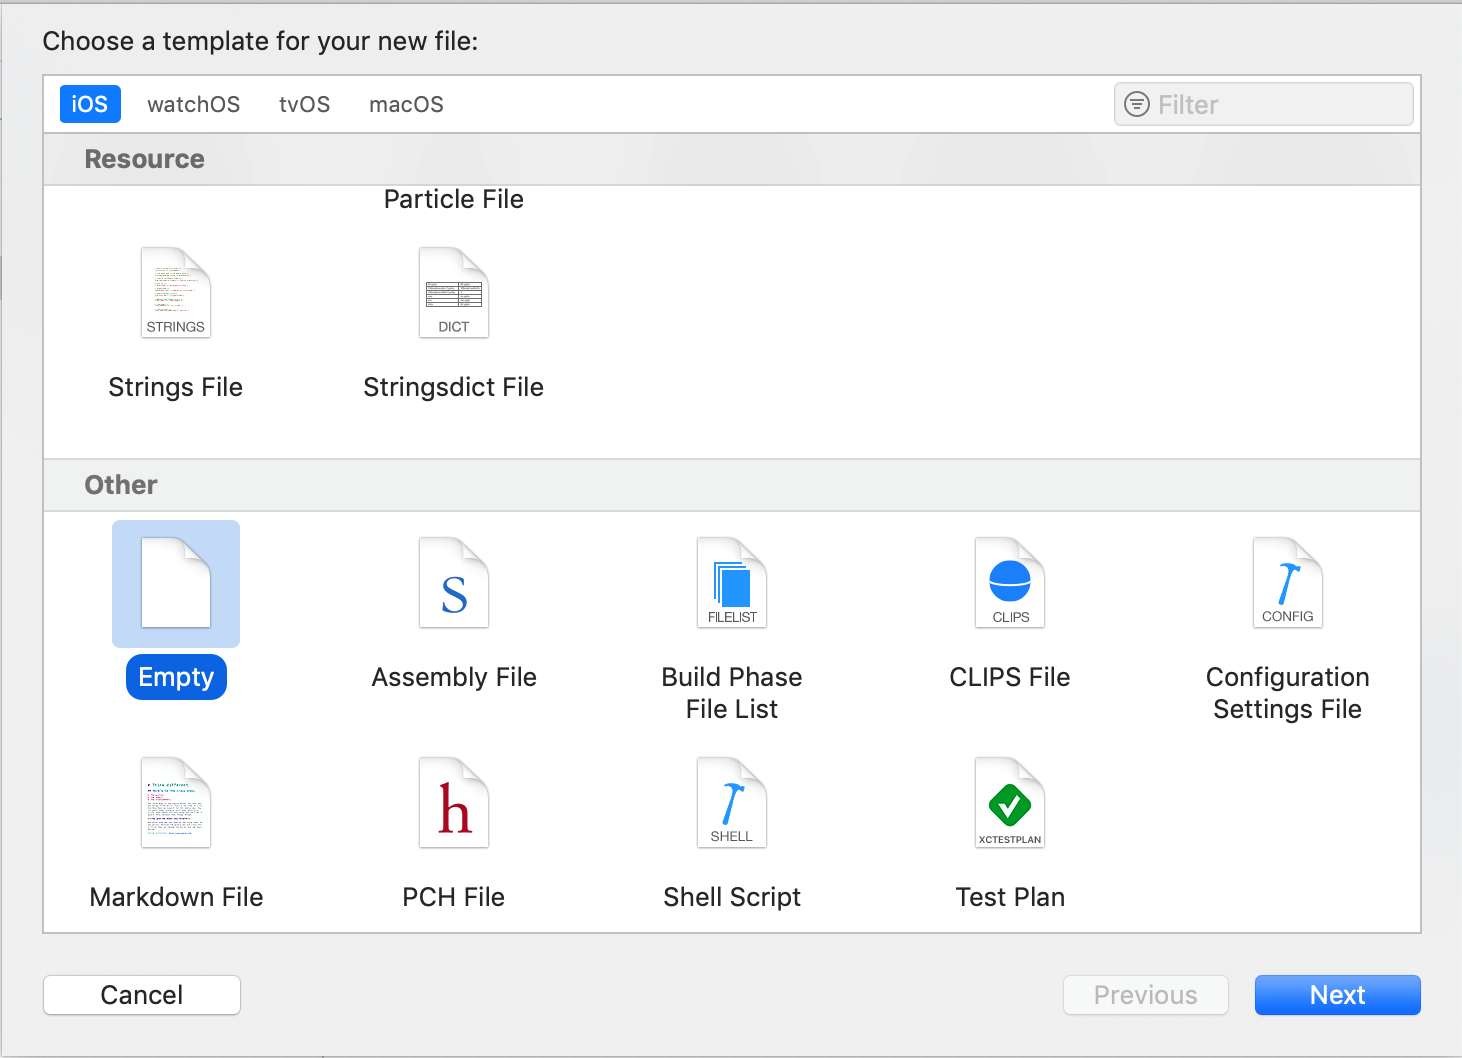
- Go to File > New > File... and select the Empty file template:
- Click Next and name the file LaunchList.graphql. Make sure it's saved at the same level as your schema.json file. As previously, don't add it to any target.
- Copy your final query from GraphiQL and paste it into LaunchList.graphql.
You're now ready to generate code from the combination of your saved query and schema.
Running code generation
- Return to your project's Apollo CLI Run Script build phase. Comment out the line that you added to the bottom (that includes schema:download). The schema isn't changing between builds, which means you don't need to refetch it.
- Uncomment the line you previously commented out (that includes codegen:generate).
- Build your project. When the build completes, an API.swift file appears in the same folder as schema.json.
- Drag the API.swift file into Xcode. This time, do check the Add to target box for the RocketReserver app. You include this file in your application's bundle to enable you to execute the query you defined.
The API.swift file
Open the API.swift file. It defines a root class, LaunchListQuery, with many nested structs below it. If you compare the structs to the JSON data returned in GraphiQL, you see that the structure matches. These structs include properties only for the fields that your query requests.
Try commenting out the id property in LaunchList.graphql, saving, then building again. When the build completes, the innermost Launch now only includes the built-in __typename and the requested site property.
Uncomment id and rebuild to restore the property.
Now that you've generated code and had a chance to see what's in there, it's time to get everything working end to end!
Running a test query
To use the generated operations in API.swift, you first create an instance of ApolloClient. This instance takes your generated code and uses it to make network calls to your server. It's recommended that this instance is a singleton or static instance that's accessible from anywhere in your codebase.
- Create a new Swift file called Network.swift and copy the code from Basic client creation into it. Make sure to add import Apollo to the top of the file.
- Update the URL string to be https://apollo-fullstack-tutorial.herokuapp.com instead of the localhost URL in the example.
- To make sure your ApolloClient instance is communicating correctly with the server, add the following code to AppDelegate.swift in the application:didFinishLaunchingWithOptions method, above return true:
AppDelegate.swift
Network.shared.apollo.fetch(query: LaunchListQuery()) { result in
  switch result {
  case .success(let graphQLResult):
    print("Success! Result: \(graphQLResult)")
  case .failure(let error):
    print("Failure! Error: \(error)")
  }
}
Build and run your application. CodeSandbox might take a few seconds to spin up your GraphQL server if nobody's been using it recently, but once it's up, you should see a response that resembles the following:
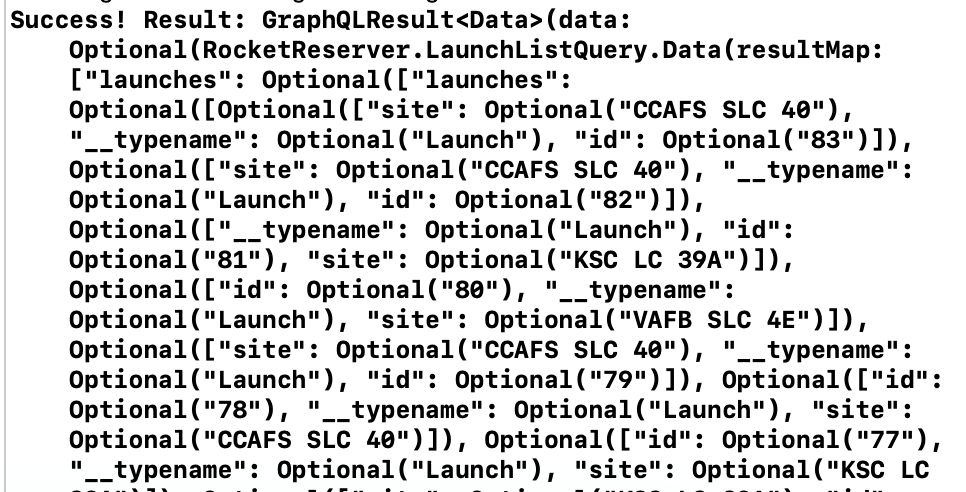
You're now successfully fetching data from the network using generated code! Now it's time to move on to displaying query results in your UI.
Previous:
Enable authentication
Next:
Fetching queries