How to Work with Security Tokens in npm
In the last tutorial, we walked you through how you can setup two-factor authentication for your npm account. In the current tutorial we will explore how you can work with and manage authentication tokens.
Note: this tutorial like the previous one, requires that you have npm version 5.5.1 or greater installed.
Anytime you login to npm, an authentication token will be generated. These tokens give you the rights to publish and access your modules.
Since a token is simply a hexadecimal string, you can make use of the token in other tools, like continuous integration testing environments, so that the tool can run with the access that it needs to complete tasks. For instance, Travis-CI provides an environment variable that you can decide to assign to a token value. This enables Travis-CI to run npm as your npm user, including the ability to install private packages that you have access.
The token commands enable you to:
- View your tokens for easier tracking and management.
- Generate new tokens, specifying full or read-only permissions.
- Delete/revoke tokens.
- Limit the access you have according to IP address ranges (CIDR).
It should be noted that there are additional steps you need to take if you wish to use tokens for testing and other special purposes.
You can work with tokens either from the CLI or from the web, this is a personal preference. Whatever you do in one environment will be reflected in the other.
Working with tokens from the web
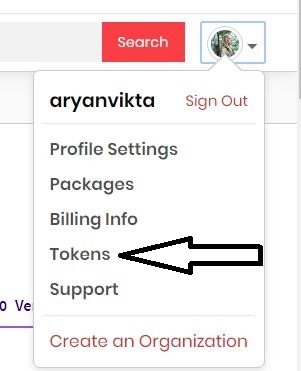
To get started, go to the Tokens page.
- Login to the website.
- Select Tokens from your Avatar User menu:
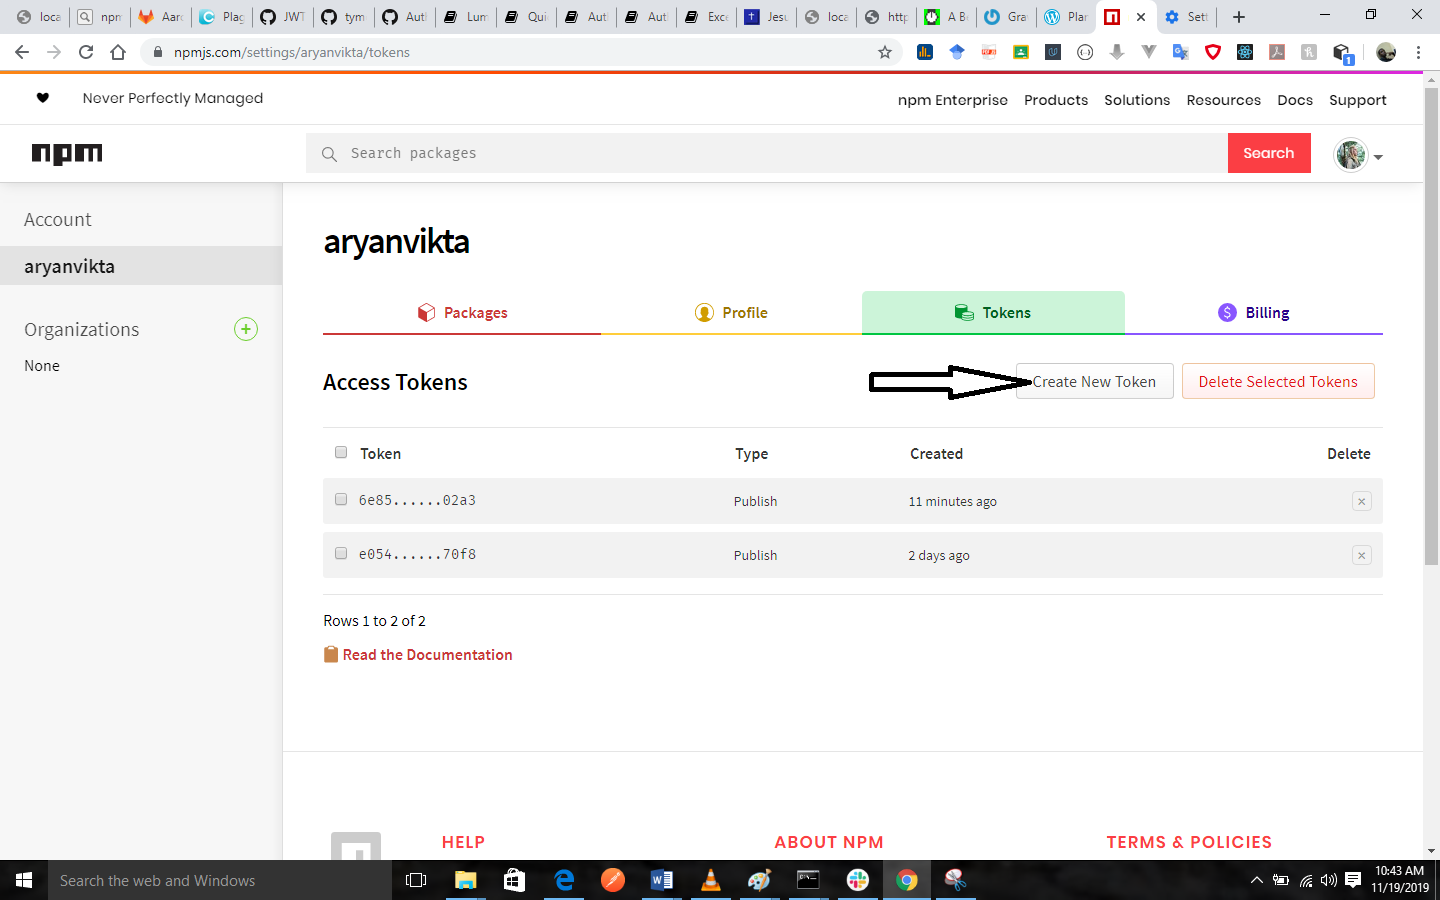
Or, while you are working in another tab on the web, you can click on the Tokens tab:

Create a New Token
How to View the Tokens that are On Your Account

Working with tokens from the CLI
How to View the Tokens that are On Your Account
If you need to view the tokens that are associated with your account, you need to type:
npm token list
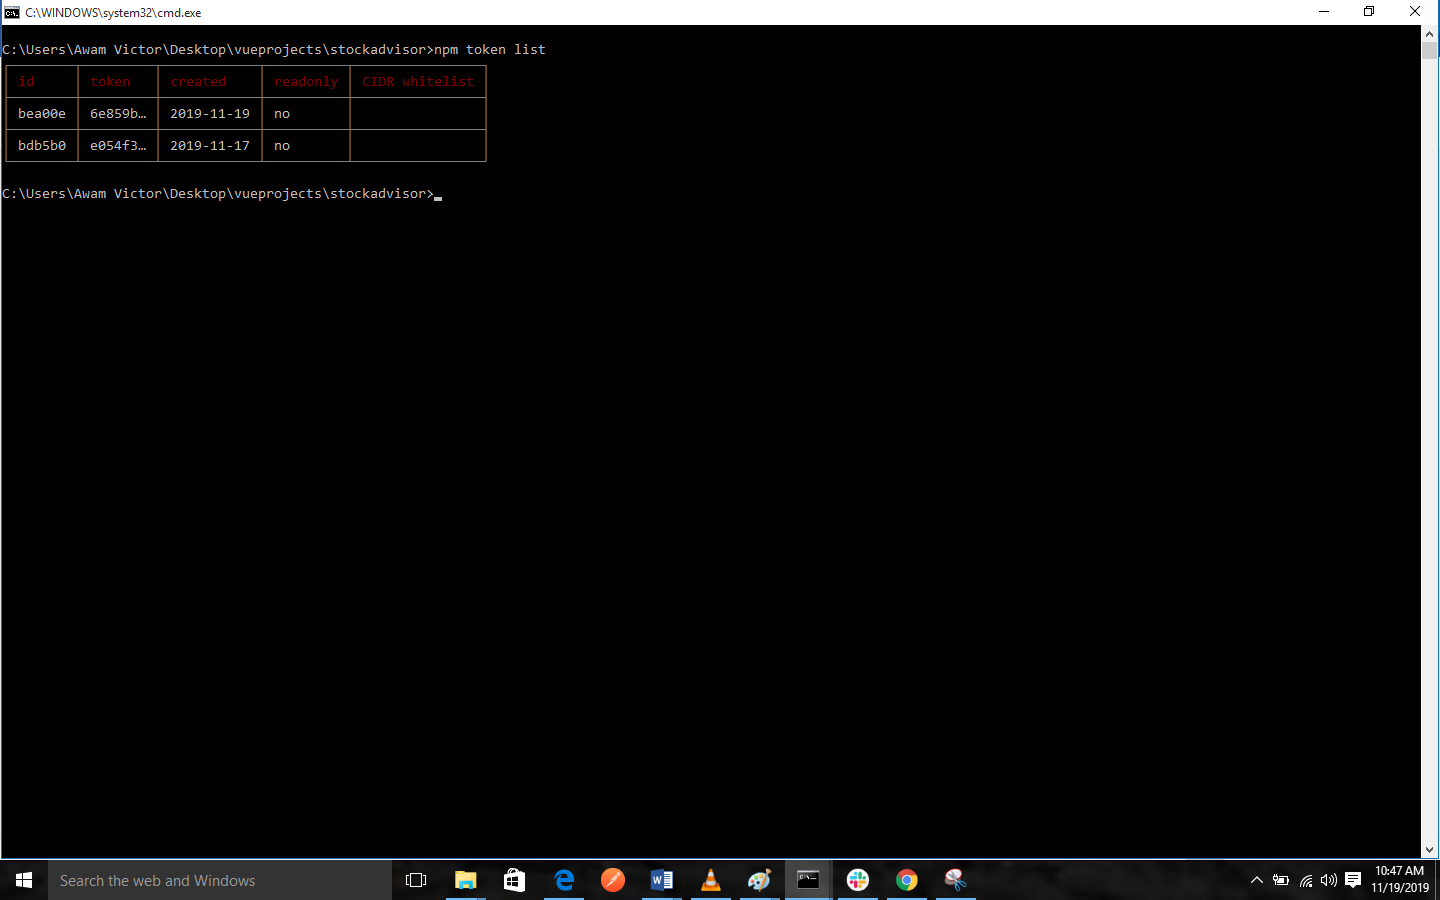
The table below explains the token list.
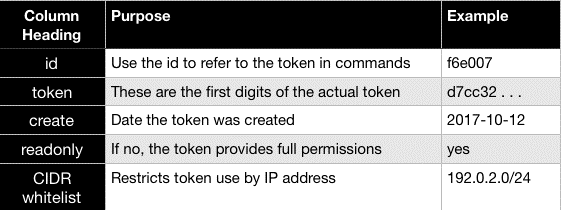
A token could be CIDR-whitelisted or read-only.
If you enabled two-factor authentication on your profile, you have successfully implemented an additional layer of security.
It should be noted that, the token list will show a truncated version of the token. You should view the npmrc file if you need to see the full token.
How to create new tokens
npm token create [--read-only] [--cidr=list]
You must decide the type of token that you want, to create a new token:
- read-only (installation/distribution rights)
- full permission (publishing rights)
- CIDR whitelist (restricted by ip address)
The setting for new token is full-permission by default.
- Read-only tokens allow installation and distribution.
- Full-permission tokens permit installation, distribution, publishing, and all rights that you have on your account
- CIDR whitelist tokens can be used from specified IP address ranges alone. You should use this to restrict tokens to a single company, or a specified developer team, for instance. Only IPv4 is supported currently.
If you set a token to be read-only, you cannot use it to make changes to a package. Whenever a token is not explicitly set to read-only, that token has full permissions, including right to publish and modify.
How to Create a New Full-Permission token:
If you need to create a new full permission token, you should type:
'npm token create'
If you have two-factor authentication set up, you will get a prompt to input your npm password, followed by a prompt for an OTP. Then, npm will display the table below:
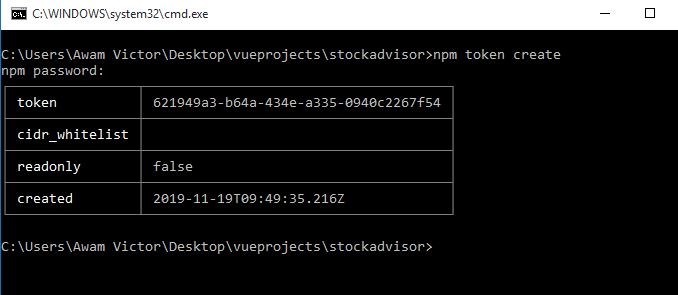
Tip: You should make a screenshot of your token field as this will be the only chance you will have to view it.
Observe that read-only defaults to false.
How to Create a New Read-Only Token
If you need to create a new read-only token, type:
npm token create --read-only
If you have two-factor authentication set up, you will get a prompt to input your npm password, followed by a prompt for an OTP. Then, npm will display the table below:
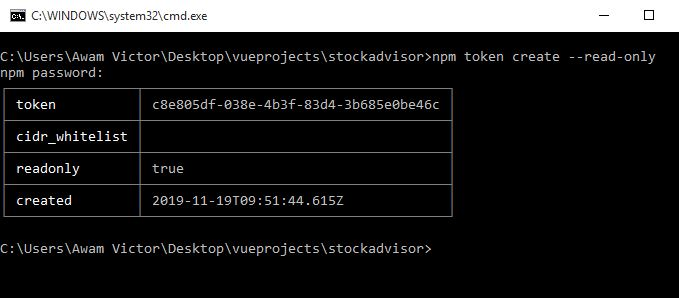
Observe that read-only defaults to true.
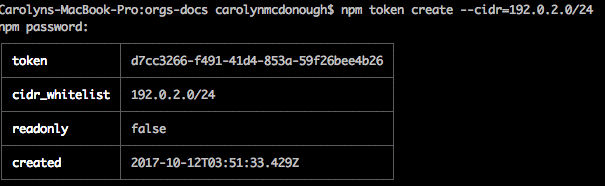
How to Create a New CIDR-Restricted Token
If you need to limit the token so that it can only be used from specified ip addresses, you can generate a CIDR-restricted token. CIDR is an acronym that means Classless Inter-Domain Routing.
Using a CIDR restriction will make it possible for you to force anyone or any system that uses the token to either remotely or physically be within the specified IP address range.
npm token create --[--cidr=list]
example:
npm token create --cidr=192.0.2.0/24
If you have two-factor authentication set up, you will get a prompt to input your npm password, followed by a prompt for an OTP. Then, npm will display the table below:
If you get a message such as this one:
npm ERR! CIDR whitelist has invalid CIDR entry: X.X.X.X./YY,Z.Z.. . .
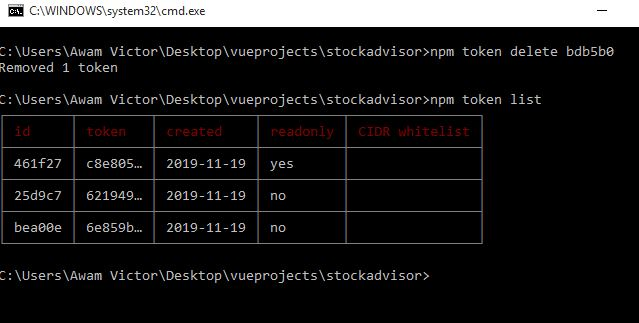
How to Revoke Tokens
Regardless of when a token was created, you can delete (revoke) it. This enables you to gain control of access that you may wish to take back.
The command to delete a token is given below:>
npm token delete
Here are the steps to revoke a token:
- Type npm token list
- Find the token ID affiliated with the token that you want to delete.
- Type 'npm token delete 1234567', where 1234567 is the token id. Note: The truncated version of the token won?t work.
npm will then report, 'Removed 1 token'
Once you have done that, you should type npm token list to confirm that the token has been removed.
The screenshot below demonstrates these steps:
It should be noted that it might take up to an hour for a token to be revoked successfully.
Previous:
How to Use Two-Factor Authentication
Next:
How to Change Profile Settings on npm.