Displaying Data
We can display data by binding controls in an HTML template to properties of an Angular component.
In this tutorial, we’ll create a component with a list of heroes. We'll display the list of hero names and conditionally show a message below the list.
At the end of this tutorial, we will achieve a functionality as shown in the screenshot attached below
Showing component properties with interpolation
The easiest way to display a component property is to bind the property name through interpolation. With interpolation, you put the property name in the view template, enclosed in double curly braces: {{myHero}}.
To get started, from the terminal, type the command: `ng new displaying-data` to create a new project named displaying-data.
Delete the app.component.html file in this newly created project as it will not be needed in this example.
Then modify the app.component.ts file by changing the template and the body of the component to the code snippet below.
import { Component } from '@angular/core';

@Component({
  selector: 'app-root',
  template: `
    <h1>{{title}}</h1>
    <h2>My favorite hero is: {{myHero}}</h2>
    `
})
export class AppComponent {
  title = 'Tour of Heroes';
  myHero = 'Windstorm';
}
Live Demo:
It is just a code snippet explaining a particular concept and may not have any output
See the Pen src/app/app.component.ts by w3resource (@w3resource) on CodePen.
In the code snippet, we added two properties to the formerly empty component: title and myHero.
The template displays the two component properties using double curly brace interpolation: thus, in the src/app/app.component.ts, add the following code snippet
template: `
  <h1>{{title}}</h1>
  <h2>My favorite hero is: {{myHero}}</h2>
Live Demo:
It is just a code snippet explaining a particular concept and may not have any output
See the Pen templete by w3resource (@w3resource) on CodePen.
The template is a multi-line string within ECMAScript 2015 backticks (`). The backtick (`)—which is not the same character as a single quote (')—allows you to compose a string over several lines, which makes the HTML more readable.
Angular automatically pulls the value of the title and myHero properties from the component and inserts those values into the browser. Angular updates the display when these properties change.
Notice that we did not call new to create an instance of the AppComponent class. Angular is creating an instance for you. How?
The CSS selector in the @Component decorator specifies an element named <app-root>. That element is a placeholder in the body of your src/index.html file:
<body>
  <app-root></app-root>
</body>
Live Demo:
It is just a code snippet explaining a particular concept and may not have any output
See the Pen index by w3resource (@w3resource) on CodePen.
When you bootstrap with the AppComponent class (in main.ts), Angular looks for an <app-root> in the index.html, finds it, instantiates an instance of AppComponent, and renders it inside the <app-root> tag.
Now on running the app. It should display the title and hero name as shown below

In the next sections of this tutorial, we will review some of the coding choices available in angular for data display.
Template inline or template file
You can store your component's template in one of two places. You can define it inline using the template property, or you can define the template in a separate HTML file and link to it in the component metadata using the @Component decorator's templateUrl property.
The choice between inline and separate HTML is a matter of taste, circumstances, and organization policy. Here the app uses inline HTML because the template is small, and the demo is simpler without the additional HTML file.
In either style, the template data bindings have the same access to the component's properties.
Constructor or variable initialization?
Although this example uses variable assignment to initialize the components, you could instead declare and initialize the properties using a constructor:
export class AppCtorComponent {
  title: string;
  myHero: string;

  constructor() {
    this.title = 'Tour of Heroes';
    this.myHero = 'Windstorm';
  }
}
Live Demo:
It is just a code snippet explaining a particular concept and may not have any output
See the Pen Constructor by w3resource (@w3resource) on CodePen.
Showing an array property with *ngFor
To display a list of heroes, begin by adding an array of hero names to the component and redefine myHero to be the first name in the array, rewrite the src/app/app.component.ts to this:
export class AppComponent {
  title = 'Tour of Heroes';
  heroes = ['Windstorm', 'Bombasto', 'Magneta', 'Tornado'];
  myHero = this.heroes[0];
}
Live Demo:
It is just a code snippet explaining a particular concept and may not have any output
See the Pen src/app/app.component.ts by w3resource (@w3resource) on CodePen.
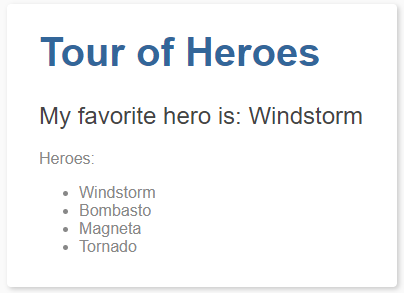
Now use the Angular ngFor directive in the template to display each item in the heroes list.
template: `
  <h1>{{title}}</h1>
  <h2>My favorite hero is: {{myHero}}</h2>
  <p>Heroes:</p>
  <ul>
    <li *ngFor="let hero of heroes">
      {{ hero }}
    </li>
  </ul>
`
Live Demo:
It is just a code snippet explaining a particular concept and may not have any output
See the Pen src/app/app.component.ts (template) by w3resource (@w3resource) on CodePen.
This UI uses the HTML unordered list with <ul> and <li> tags. The *ngFor in the <li> element is the Angular "repeater" directive. It marks that <li> element (and its children) as the "repeater template":
The <ng-template>
<li *ngFor="let hero of heroes">
  {{ hero }}
</li>
Live Demo:
It is just a code snippet explaining a particular concept and may not have any output
See the Pen src/app/app.component.ts (li) by w3resource (@w3resource) on CodePen.
Don't forget the leading asterisk (*) in *ngFor. It is an essential part of the syntax.
Notice the hero in the ngFor double-quoted instruction; it is an example of a template input variable.
Angular duplicates the <li> for each item in the list, setting the hero variable to the item (the hero) in the current iteration. Angular uses that variable as the context for the interpolation in the double curly braces.
Now the heroes appear in an unordered list
Creating a class for the data
The app's code defines the data directly inside the component, which isn't best practice. In a simple demo, however, it's fine.
At the moment, the binding is to an array of strings. In real applications, most bindings are to more specialized objects.
To convert this binding to use specialized objects, turn the array of hero names into an array of Hero objects. For that you'll need a Hero class:
`ng generate class hero`
With the following code in the src/app/hero.ts file
export class Hero {
  constructor(
    public id: number,
    public name: string) { }
}
Live Demo:
It is just a code snippet explaining a particular concept and may not have any output
See the Pen src/app/hero.ts by w3resource (@w3resource) on CodePen.
You've defined a class with a constructor and two properties: id and name.
It might not look like the class has properties, but it does. The declaration of the constructor parameters takes advantage of a TypeScript shortcut.
That brief syntax does a lot:
- Declares a constructor parameter and its type.
- Declares a public property of the same name.
- Initializes that property with the corresponding argument when creating an instance of the class.
Using the Hero class
After importing the Hero class, the AppComponent.heroes property can return a typed array of Hero objects:
heroes = [
  new Hero(1, 'Windstorm'),
  new Hero(13, 'Bombasto'),
  new Hero(15, 'Magneta'),
  new Hero(20, 'Tornado')
];
myHero = this.heroes[0];
Live Demo:
It is just a code snippet explaining a particular concept and may not have any output
See the Pen wbKQMx by w3resource (@w3resource) on CodePen.
Next, update the template. At the moment it displays the hero's id and name. Fix that to display only the hero's name property.
template: `
  <h1>{{title}}</h1>
  <h2>My favorite hero is: {{myHero.name}}</h2>
  <p>Heroes:</p>
  <ul>
    <li *ngFor="let hero of heroes">
      {{ hero.name }}
    </li>
  </ul>
`
Live Demo:
It is just a code snippet explaining a particular concept and may not have any output
See the Pen pmjQym by w3resource (@w3resource) on CodePen.
The display looks the same, but the code is a lot clearer.
Conditional display with NgIf
Sometimes an app needs to display a view or a portion of a view only under specific circumstances.
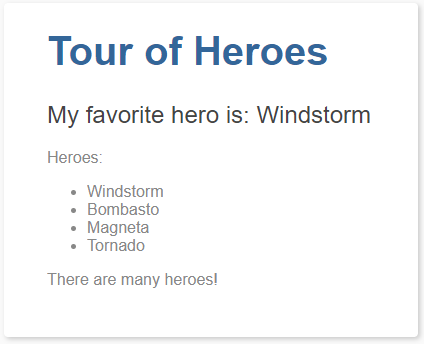
Let's change the example to display a message if there are more than three heroes.
The Angular ngIf directive inserts or removes an element based on a truthy/falsy condition. To see it in action, add the following paragraph at the bottom of the template:
<p *ngIf="heroes.length > 3">There are many heroes!</p>
Live Demo:
It is just a code snippet explaining a particular concept and may not have any output
See the Pen src/app/app.component.ts (message) by w3resource (@w3resource) on CodePen.
Don't forget the leading asterisk (*) in *ngIf. It is an essential part of the syntax. Read more about ngIfand * in the ngIf section of the Template Syntax page.
The template expression inside the double quotes, *ngIf="heroes.length > 3", looks and behaves much like TypeScript. When the component's list of heroes has more than three items, Angular adds the paragraph to the DOM and the message appears. If there are three or fewer items, Angular omits the paragraph, so no message appears.
Angular isn't showing and hiding the message. It is adding and removing the paragraph element from the DOM. That improves performance, especially in larger projects when conditionally including or excluding big chunks of HTML with many data bindings.
Try it out. Because the array has four items, the message should appear. Go back into app.component.ts and delete or comment out one of the elements from the heroes array. The browser should refresh automatically, and the message should disappear.
Summary
Now you know how to use:
- Interpolation with double curly braces to display a component property.
- ngFor to display an array of items.
- A TypeScript class to shape the model data for your component and display properties of that model.
- ngIf to conditionally display a chunk of HTML based on a boolean expression.
Previous: Structural Directives
Next:
Upgrading for Performance