Java Development Environment Setup
Download and Install JDK, Eclipse (IDE)
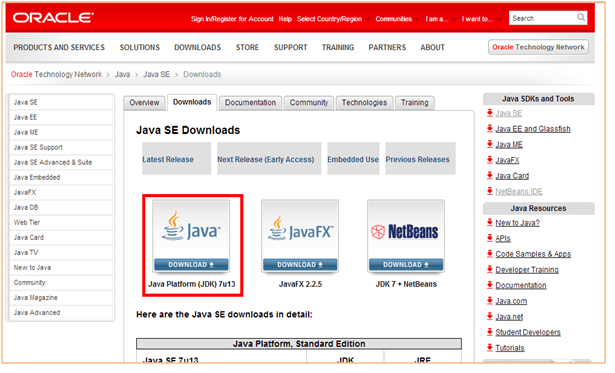
To develop and run any java program you need to install JDK in your system. You can download the latest version of Java from here http://www.oracle.com/technetwork/java/javase/downloads/index.html). Once you open the link you will be able to see something like below (Figure 1) screenshot. Click on the red colored box to download JDK.
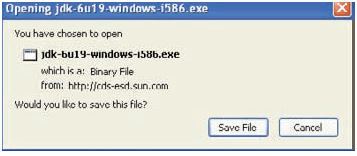
After selecting the Windows platform and clicking the Download button you’ll see a Login for Download screen, which is optional: You can skip this step. Click Save File on the pop-up screen, as shown in Figure 2 (the file name depends on the version of JDK).
Once download completes you can start the installation. It is very much similar to the installation of other software on windows. A couple of minutes into the installation process you’ll see a pop-up window asking you where to install JRE. I’ll assume that you’ve accepted the default directory (c:\ProgramFiles\Java\jre6), but you can select a different one. Shortly, you should see a message telling you that installation was successful.
You can recheck installation using the command prompt. Use “java-version” command to check installed JRE version.
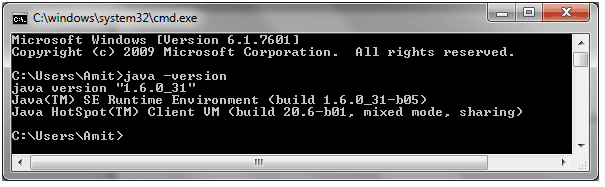
If you can’t see Java version as above on command prompt, you need to set class-path in the system variable. For Windows XP/Windows 7 - To set the PATH permanently:
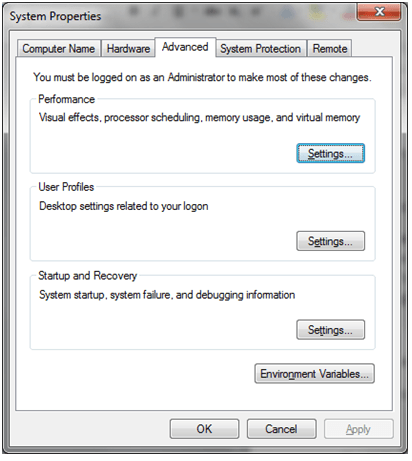
Choose Start, Settings, Control Panel, and double-click System and select the Advanced tab and then click on Environment Variables (Figure 4). Look for "Path" in the User Variables and System Variables. If you're not sure where to add the path, add it to the right end of the "Path" in the User Variables. The value should be installation directory: “C:\Program Files\Java\jdk1.6.0_11\bin”
The new path takes effect in each new Command Prompt window you open after setting the PATH variable.
Java program can be written using a plain text editor and compiled using command window. This is not a productive way of programming. Professional programmers use one of the Integrated Development Environments (IDEs), which include an editor, a compiler,type-ahead help, a debugger, and a lot more. There several popular Java IDEs.
(1) Eclipse: Free IDE with long list of plugins and great community support
(2) NetBeans (http://netbeans.org/downloads/): Free and light weight IDE
(3) IntelliJ IDEA (http://www.jetbrains.com/idea/download/): It comes in two flavors. Free as well as paid version. Paid version is real powerful with great plugins.
(4) RAD (http://www.ibm.com/developerworks/downloads/r/rad/): Free for evaluation.
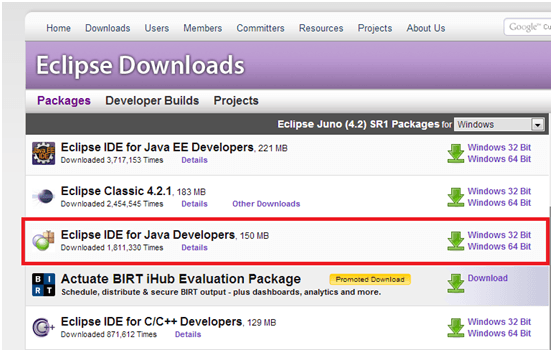
We will use Eclipse IDE for demo purpose in our tutorials. Eclipse download site http://www.eclipse.org/downloads/. Eclipse does not need any installation. Just download the zip file and unzip it to a disk drive of your choice. You will find the file eclipse.exe in the Eclipse folder — just run this program. You will immediately see a pop-up window asking you to select a workspace, which is a directory on your hard disk where one or more of your projects is going to be stored.
Running Java Program on Windows
Let’s try to run first Java program. To start writing a Java program you could use any plain text editor. The file that contains hello-world Java code must be the saved.java extension. Create a directory inside C drive like “c:/javadevelopment/”. Now save below code as HelloWorld.java. (If you are using Notepad, select All Files in the Save as Type drop-down to avoid auto attachment of the .txt suffix).
Step1: Create HelloWorld.java
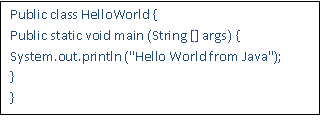
Enter the following code in the text editor.
package sct;
class HelloWorld {
/**
* comments
*/
public static void main(String[] args) {
// Comment: printing output on console
System.out.println("Hello World from Java");
}
}
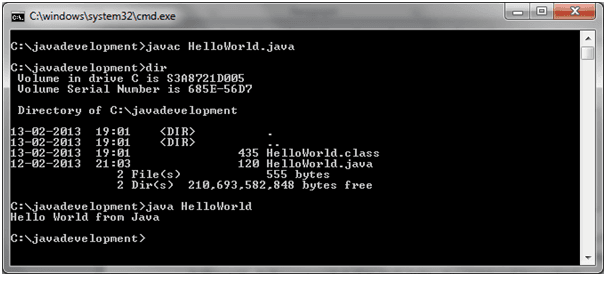
Step2: Compile HelloWorld.java
use javac HelloWorld.java (press enter)
Step3:
After compiling java file, you can see .class file created (HelloWorld.class). This is bytecode of our java program which can run on any platform. We can try running on our JRE using java command – java HelloWorld (press enter)
NOTE:
Keep in mind that Java is a case-sensitive language, which means that if you named the program HelloWorld with a capital H and a capital W, you should not try to start the program helloworld. Refer screenshot (Figure 6) below for command line output.
Running Java program on Linux
Step1:Create a source file:
You can use any text editor to create and edit source files. Create directory using following commands.
cd /tmp
mkdirjavadevelopment
cdjavadevelopment
Create Java source file using vi editor and either type following lines or copy following lines in the file.
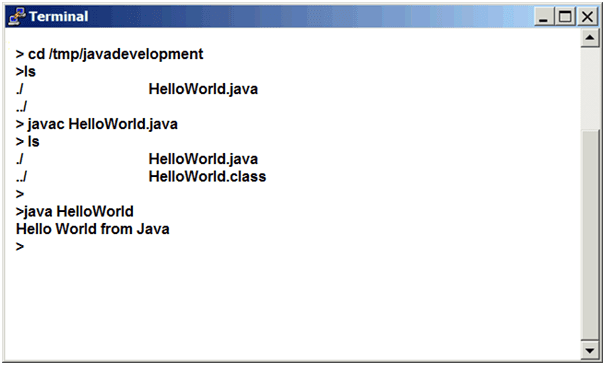
Step2: Compile Java file:
To compile your source file, change your current directory to the directory where your file is saved. Type the (javac HelloWorld.java) command and press enter. After compilation process ends you will be able to see HelloWorld.class file created in the same folder.
Step3: Run Java Program:
Type (java HelloWorld) command and press enter to see the output on the screen.
Please refer figure 7 for commands and screen views on linux terminal.
Summary
- Java is platform independent programming language which means compile once and run anywhere.
- Java provides built-in functionality for Thread, collection, File IO etc.
- The Java language is object-oriented (OO) programming language which will allow the programmer to relate java domain objects with real life objects.
Previous: Java Primitive data type
Next: Compiling, running and debugging Java programs